The paracord is one of the most practical supplies you can have in an emergency.
You can make:
- Tourniquets
- Slings
- Splints
- Fire starter
- Fishing line (simply pull out the white strands inside the larger green tube)
- Tie off for a makeshift shelter
...All using a pack of 100-foot Nylon Paracord. The possibilities are endless.
Having even a single yard of paracord could make all the difference in a survival situation when your supplies are limited. It's the perfect pack item in your go-bag.
Here are 4 DIY paracord projects that survivalists have crafted to show you just how useful paracord can be in an emergency and in everyday life.
Mag Light Handle by Rick
In this project, you do the same knot you’d use to make a paracord bracelet, but instead of closing it off to fit your wrist, you wrap it around a flashlight handle.
Here’s what Rick has to say about it:
"I came up with this tutorial on my own, using a basic paracord knot traditionally used for paracord bracelets. I started by looping the paracord around the base of the flashlight a couple of times."
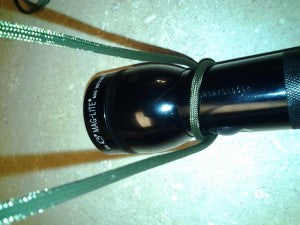
Next, I tied the basic paracord knot until it reached my desired length (you can keeping going to the top of the flashlight, if you’d like. It's up to you how long).
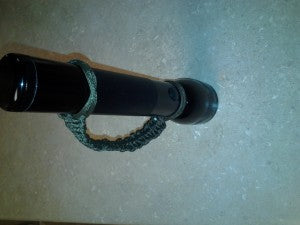
At this point, I wrapped the paracord around the end of the flashlight in a similar fashion to what I’d done at the base. I tied it off by making two knots so it would stay.

Dog Collar by Kim
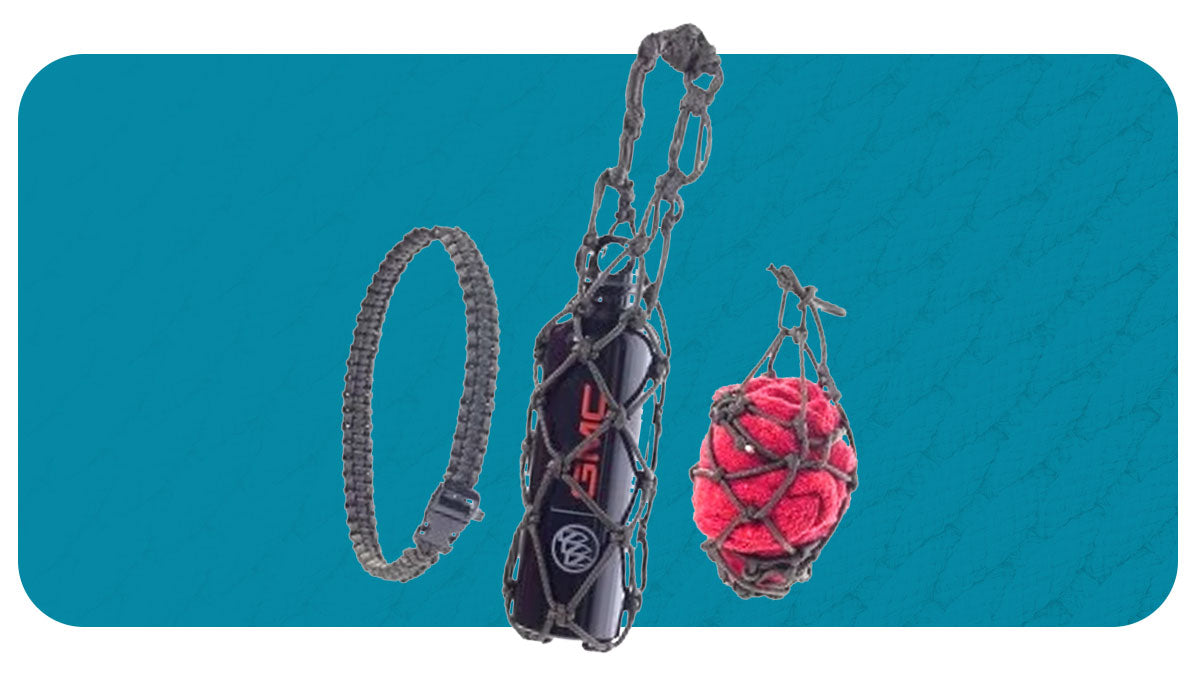
I made this 18” collar to fit an adult golden retriever using a great tutorial I found at Irrelephant-blog.com. It took me less than 2 hours. Check out their blog for an easy step-by-step tutorial.
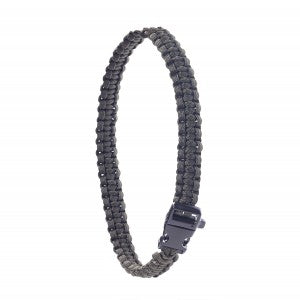
- To make it easier, try to keep each strand of your paracord untwisted from itself the moment you begin tying knots. If one (or both) of the strands twist with itself, then it’ll be harder to get a tight knot along the collar.
- Once you know how much paracord you need to work with, you can cut it with a few feet to spare, but make sure you know exactly how much you’re going to need so you don’t cut it too short. If you aren’t positive, sometimes it’s safer to keep all of your paracord attached to the project you’re working on—just to make sure you have enough of it.
I left the entire Nylon Paracord intact while I made my dog’s collar. But almost immediately I realized the strands were inevitably going to tangle with each knot I tied. I found it helpful to fold up one of the strands I was working with and secure it with a hair elastic to keep it from tangling with the other strand.
This got one strand of paracord out of the way while I worked at tying with the other side, but made it easy to pull out a little more paracord at a time as I needed it, and ultimately have enough to finish my project.
Want more paracord? Check out this tutorial for making a paracord dog leash to go along with your dog collar.
Water Bottle Sling by Angela
I followed a step-by-step tutorial from instructables.com (It has pictures of each step; it’s great!), but I modified a couple of the steps to give you some extra tips and tricks that I found helpful.

- Hint for Step 1—Measuring your Paracord: I used a measuring tape to measure out 112 inch strands (you need 4 strands) and used sewing pins to mark off each 112 inch section of my 50’ Nylon Paracord pack. I then cut the strands by each pin. After cutting, burn the ends of your paracord right away so it doesn’t fray (I learned this the hard way). Trust me. It makes things easier in the long run.
- Hint for Step 3—Making a Chinese Good Luck Knot and Cross Knot: When I first did this step, I made my “S” too big. This caused my knots to be much further down from the Chinese good luck knot than they should have been. Make smaller “S” shapes to make your cross knots look even throughout the design.
At first, it may be easier to mark off the “S” shape with pins for a clearer visual of where your left strand will weave through to make the cross knot. Once you get the hang of it, take the pins out and you should be able to make the knot like a pro.
Easy Paracord Drawstring Pouch by Sharon
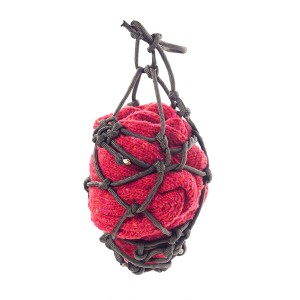
I chose to make the “Easy Paracord Drawstring Pouch” from instructables.com. It looked attractive, useful, and—well, easy! However, I found that the instructions assumed a few things about the user:
1) They knew how to make a Celtic drawstring knot
2) They knew what an overhand knot was and how to make one. Instructables.com shows good photographs with the instructions, but in step three it’s a little hard to tell which strand is supposed to go over and which strand is supposed to go under to create the knot.
I ended up looking for other sources for each of those knots, and found both written instructions and videos. I found some good videos where they divide each step into separate segments, so you can stop the video and watch the instructions as often as you need to before you go on to the next step.
Check out this Youtube Video with easy instructions for making a Celtic knot.
I also learned that the experts really do mean it when they tell you to singe the ends of your paracord to keep them from fraying, as fray they will! My first—and second—attempts to get the project started ended in confusion and frustration. I had to start over several times because I kept losing track of where I was and which strand was being pulled through the knot.
The third time, I downsized the project and attached a pen cap to the cord being pulled through to create the knot if I had to leave it for a bit. This method worked and I was able to finish the project.
Have you ever made anything out of Paracord? If so, how has it helped you in an emergency or everyday life?

7 comments
Rattles
I carry my Russian tortoise it a soft cooler with MOLLE grid on the back of it. Mostly he walks beside me but sometimes he needs a lift. When I would bend over to pick him up, the cooler would swing forward, so I had to grab it to keep it from whacking him. Made a short cobra weave with small s-biners on the ends. One end clips to the MOLLE. The other clips to my belt loop. Keeps the bag from swinging around when I’m getting on and off the ground or bending over. Could have knotted directly to the MOLLE, of course and just used on S-biner, but using two allows me to swap it to other bags. Works nicely to keep my gear from swinging around when I’m doing photography on rattlesnake dens.
As a somewhat frivolous aside, my cat’s favorite toy is a randomly knotted paracord “bug” with the ends left an inch long for antennae (but sealed to prevent fraying) Light enough for him to carry around, and toss.
William Davis
thanks for the help
Linda Sand
A friend of mine made a bootlace from paracord the other day when he got tired of cheap bootlaces breaking. He melted a bit of shrink wrap tubing over the ends to help with lacing his boots.
Tracy Isenberg
I used a ladder knot to make a gun sling for my father for Father’s Day. Talk about having problems with the rope twisting on me! It took 89 FEET of paracord but he LOVES it.
I also make keychains that have a buckle in the middle. That way you can have 2 sets of keys together or separate. My husband uses it to have his house keys on one end and work keys on the other. When he is home in the afternoons and weekends he can unhook his work keys and not have to carry around that extra weight.
Grama Pei
I used a length of paracord the other day to help me carry a full sheet of plywood with my son manning the back end. We had to go down a grassy bank, and down a hill tot he big shop, to store it, so I measured off about 5’, tied large knots in each end, for handles, then looped the cord under the front edge of the board, standing the board on the long edge. I grasped the knots and lifted the front edge of the board off the ground, and we got it down the hill and into the shop without problem. Very helpful.
Lori Mavity
Thank you! How fun!!!
Andrew Newton
When my clothes dryer broke down I used paracord as a field-expedient clothesline. It worked so well, I kept it up, using it even after I repaired the dryer. "Better to have it and not need it, than to need it and not have it."