If you were lost in the wild without any clean water to drink, making your own solar still could be a great way to get clean water until you can get back to civilization.
But what
is a solar still?
A Solar still is a method of distilling (cleaning) water, using the heat of the sun to evaporate water from soil. Functionally, you’re turning the water from the soil into vapor, and then you collect the condensation to drink. Solar stills can range solar ovens to using a simple tarp over a hole in the ground.

Distillation does a good job of removing many contaminants and pathogens. It removes dirt, bacteria, viruses, and protozoa. It also removes metals such as lead, copper, and sodium. Distilling removes many things you are likely to Replace in the water,
but not all.
If something vaporizes at a lower temperature than water e.g. alcohol or gasoline, it will come out in the distillate. This means that distillation is not going to be useful for chemical contamination, especially in a do it yourself situation.
DIY Solar Still Instructions
Here’s what I did and what I learned when I made my own solar still. I decided to try a couple techniques for making a solar still that could apply in two different situations. Both techniques use the same materials.
Materials:
The Sun
Bowl (about 12 inches in diameter, preferably larger)
Mug or Plastic container (think Tupperware)
Plastic Wrap or Sheeting
A Weight (a rock, brick, box—anything heavy you can Replace to hold down the plastic wrap down)
Shovel (or a tool or rock that can dig a hole)
Plant Material (shrubs, grass, leaves, etc.)
Solar Still #1: Coffee-Mug Still
For the first one, I assumed a situation such as an earthquake or flood that leaves you in your home (sheltering in place), but causes a disruption in utilities. While normally you would have safe drinking water stored, in the event that you don’t—or it somehow became contaminated, you may need to make a simple solar still.
What I did:
- I put salt water in a bowl that is about 12 inches in diameter. I then put a coffee mug in the center of the bowl. I placed the bowl on a table, directly in the sunlight.
- I covered the bowl in plastic wrap and put a weight on the center above the mug to direct the condensation toward the mug. All that was left was to put it in the sun and wait.
- The contaminated water went into the bowl, then the condensation on the plastic wrap drips into an empty mug in the center, filling it with clean water.
This method worked, but there were a couple major shortcomings. The first time I tried it, the sky clouded up and I was rewarded with only a few drops of water for a whole day of waiting. The next try was better, but a day of sunlight still only yielded about one quarter cup fresh water. This would require a lot of bowls if you were relying on it for drinking water. I think an increase in surface area would make a big difference in how much water is produced.
Solar Still #2: Pit-Style Solar Still
The second method I used was more of a survival technique. You might use this type of solar still if you have to evacuate your home in an emergency and live off the land.
What I did:
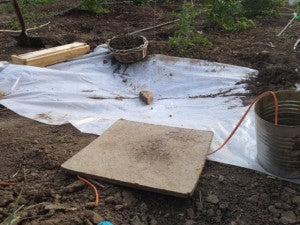
- I dug a shallow hole in my garden about 3 feet in diameter.
- I then filled the hole with plant material and placed a water collection cup in the center.
- Similar to the set-up described above, I once again covered the collection cup in a plastic sheet.
- I then placed a rock in the center to cause the condensate to run to the middle and drip into my collector cup.

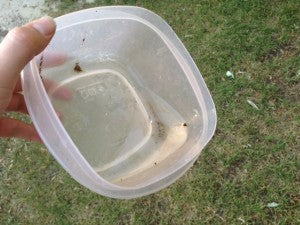
I did this on a hot sunny day, for the entire day, and collected around one third of a cup of water.

What I learned
The second method is energy intensive, both in terms of physical labor and in terms of the energy required to vaporize the water. If you’re in a survival situation, you may want to weigh the outcome: the work required may not be worth the water produced. If you’re on the brink of dehydration, any amount of water could help you, so making a pit-style solar still could be well-worth it to you then.
The Solar Still is a little tricky to get right, as well. The clouds completely ruined my first attempt. On my second attempt I managed to get water, but it was disappointingly full of dirt from the plants I was putting in the pit.
Given the right situation, however, I can imagine this process being fairly useful. In a beach, swamp, or marshy area, the pit-style still would continually recharge with water from the soil. It would work passively and could be fairly productive.
Since there’s so little water produced from the solar still, it’s important to use more than one method of water collection to make sure you have enough water to keep yourself hydrated. Check out the post “Replaceing Water in the Wild” for more water collection techniques to try out.


4 comments
beprepared
Ron,
When you test out the tire still, please let us know how it works out and how much water it produced for you. We’d really like to know! What are some other things you can build a solar still from?
Angela
RonGriffin
As I mentioned last week in a blog about this same subject, I built a solar still once just to see if it would work. I found out some lessons. DA I agree with you about lining the pit with another layer of plastic so you can harvest water from other sources such as urine and the water out of MRE heaters.
Next, I found that by using a reflective material such as a space blanket or tin foil and wrapping it around the sides to reflect additional light onto the pit the output got better.
As Joe and Angela stated, digging hole is a big job. I would suggest looking for a depression in the ground to start with. In the desert there are a lot of low spots in sanding soil.
I just heard of a cool trick that I want to try. If you happen to find an old tire (Larger the better) minus the rim, make your still over the tire. Put the plastic below and above the tire. Then place your wet material or water on the lower plastic or even inside the tire. Put the cup in the center. The tire being black will get very hot very quick. You will get a lot more still action and you do not need to dig a hole. If you find multiple tires even better.
I am going to try this method when I get a chance. One thing I know about the desert is that there are in fact a lot of old tires laying around. You might survive thanks to a litter bug.
Ron G.
beprepared
da Dougrus,
Thanks for the advice! Under what circumstances were you using the solar still? Do you just do it for water collection at home? or was this for a camping or outdoor situation? In the post, Rick suggests it may not be totally worth it in a survival situation because of the energy it takes to build it and the amount of water you get from the process. Do you think the solar still would be just as effective in a survival situation? What are your thoughts? And this question goes out to all other commenters on this post—What do you think?
Angela
da Dougurs
I have in past used the pit method very successfully many times However may I point out you need to seal your cover cloth All around the edges, thus to minimize any vapor leakage and I line the bottom of my pit with a black garbage bag and then use leaves or fresh plant material as a wick effect for any contaminated water I may have Which I sprinkle all over, My results are normally over 50% in collected water in 48 hours of just leaving it alone This is good on a hot day for two quarts or slightly less in a 3 foot Diameter X 1foot deep pit..
Works for me..
30—-