
Imagine being lost in the wild without any water. You’re dizzy, exhausted, and lightheaded—all signs of dehydration. You need water and you need it fast.
Staying hydrated becomes even more important during a survival situation when you’re exerting more energy to survive. So if you were lost in the wild, would you know how to find water only using clues and hints from the landscape?
In the ideal scenario, you’ll probably have water storage or pre-packaged water you can take with you on the go. But let’s say you don’t have that luxury, you’re away from your supply, or you’ve run out of water. Here are our tips for finding water in the wild.

Signs of Fresh Water
Although many in search of fresh water in a city or town can resort to filtering and purifying water from fish ponds, finding fresh water in the wild can be trickier. The most obvious place to look for water in the wild is a stream, river, or lake.
But let’s say there are no large bodies of water in sight or that you’re, unknowingly, just a few miles away from the nearest water source. You can look for signs in the landscape to help you find that water source. Here’s what you should look for:
- Low-lying Areas and Valleys: Water always flows downhill and into valley bottoms, so head in that direction. Water naturally drains into valley bottoms.
- Patches of Green Vegetation: An abundance of lush, green plants is a good sign that a water source is nearby. If you see a patch of vegetation, try digging in that spot. Water may be just below the surface.
- Animals: Most animals drink in the early morning or late afternoon. You can follow animals or animal tracks to water (just be careful of the type of animal you’re following so you don’t get attacked…). The book Outdoor Survival says, “If the tracks lead downhill and converge (they meet up at a certain point), they could lead to water.”
- Insects: A large swarm of insects is a good indicator that a water source is nearby. According to the SAS Survival Handbook, “Ants are dependent upon water. A column of ants marching up a tree is going to a small reservoir of water.” Bees are also good indicators that water is nearby.
- Bird Flight Patterns: If you see birds flying early in the morning in a tight, organized formation, they are probably heading to a water source. Watch their flight patterns and follow them to water.
- The Sound of Running Water: Ok, I know you’re thinking, “Duh! Of course the sound of water is a sign.” But did you know that if you take a moment to stop and listen intently, you can hear the sound of water from great distances? Taking a moment to listen can help you find fresh water.
- Muddy Areas: If you find a muddy patch, start digging. Muddy areas are signs of ground water. Dig a hole that’s a foot deep and a foot in diameter and wait. Water will fill the hole. Just remember to filter and purify the water before you drink it.

How to tell if Water is Safe to Drink
It’s important to understand that any time you find an “unconventional” water source in the wild it’s best to always purify and filter it. Fresh water springs (think the Swiss Alps) are usually clean and good to drink, but even if you’re at a spring always take caution when drinking from an untreated water source, because- Water in the wild could have feces, blood, and other contaminants. Fill your water bottle or container from the main output source of the water instead of getting it from a still pool downstream. Moving water keeps the water from “marinating” and harboring microorganisms
- Water could be contaminated by chemicals and other pollutants. Check for vegetation and/or signs of animals by the water source. If there aren’t any, it may be contaminated.
Think of these tips before you decide to drink from a body of untreated water. The best option is, of course, to filter and treat every “found” water source. Even if you get desperate and really thirsty, the US Army Survival Manual cautions to never drink . . .
Chart courtesy of US Army Survival Manual

Always Filter and Purify your Water
When you find a water source, it’s important to find the cleanest water possible. This means that the water is fairly free of turbidity (big floaties). The better your water source, the better your filtered and purified water will be.
Also, besides protecting you from contracting any water-borne viruses, starting with the cleanest water possible will maximize the life of your filter. A common way to purify water is to boil it to kill any microorganisms (bacteria, viruses, etc.).
But boiling may not be ideal if you don’t have the necessary equipment to start a fire or a container to hold your water. You can filter your water using a microfilter. Microfilters block impurities and most microorganisms in your water.
If you don’t have a microfilter on hand, you can filter water by straining it through a cloth into a cup, water bottle, or large leaf … but filtering it alone will not eliminate viruses, bacteria, and protozoans in the water. You need a way to purify the water as well.
- Steripen: A Steripen, which purifies water UV light, is great to have on hand. It disrupts the DNA of microbes that could make you sick, purifying your water in seconds. It is small enough to fit in your pocket or daypack. Remember that the water must be clear in order for the Steripen to work (water cannot be full of turbidity—large floaties, branches, leafs, etc.), so pre-filter the water before purifying.
- Micropur Tablets: You can also use tablets to purify your water. However, keep in mind that when using tablets it’s important to follow the instructions on the package. It takes four hours for these tablets to kill 99.9% of all microorganisms in the water. They are effective at protecting you from Cryptosporidium, Giardia, bacteria, and viruses in your water.

What if I don’t have a Filter or Purifier?
If you don’t have a way to filter or purify your water, and you’re just trying to find water to survive, the quality of the water may not matter as much to you.
Always start with the “cleanest” water source you can find to avoid getting sick. At this point, you’ll have to weigh your chances of getting sick with the possibility of becoming dehydrated. You can find the “cleanest” water from the following sources:
- Moving water. Always go to the output point of a body of moving water. This way, you’ll know the water is clean. Streams are almost always better than ponds because the water is constantly moving and changing.
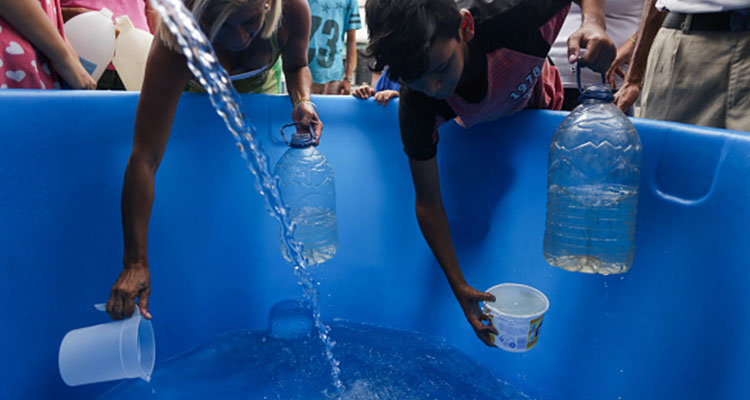
- Solar disinfection. Put untreated water (free of turbidity) into clear plastic bottles. Leave the bottle in the sun for about 8hrs. The UV will disinfect the water. This water cannot be stored, but is good for emergencies.
- Rock Beds. Water moving through rock below the surface is generally very clean when you dig it out and it reaches the surface.
- Snow runoff. Runoff from snow that runs is generally very clean until it makes contact with the ground or another contaminated area.
The idea is to find a water source to help you stay hydrated until you can get somewhere with clean, safe water (like your home if you get lost while hiking, or an emergency shelter, etc.).

5 Water Collection Techniques
In addition to looking for signs of fresh water, there are ways that you can use the landscape to collect water using condensation, dew, rainwater, and ice/snow. Always try using more than one water collection technique or use a water collection technique and signs in conjunction so that you can have multiple ways of getting water and a way to increase the amount that you find.
Check out these five techniques for collecting water in the wild:
1. Use Condensation from Trees and Branches-- Look for a leafy bush or tree branch that is healthy with vegetation. Tie a plastic bag around the branch using paracord or rope. The evaporation from the plant will create condensation in the bag.
2. Make a Solar Still- Using plastic sheeting, a shovel, container, drinking tube, and a rock, you can create a solar still—a type of water collection system that uses condensation and the sun to create a water reserve.
- Look for a moist area that gets a lot of sunlight for most of the day. Dig a bowl-shaped hole that’s three feet across and two feet deep. Adding plants and vegetation to your hole helps to create moisture.
- Make sure that you create a small hole at the bottom of the bowl-shaped hole to hold your container. Put the container in that small hole and place your drinking hose into the container so that it runs out of the main hole. Lay the plastic sheet over the hole and cover the sides with rocks and soil to keep the plastic in place.
- Place a rock in the middle of the plastic and let it slide down about 18 inches, right over the top of the container. Add more soil and rocks to the edges of the plastic to keep it in place.
- The moisture from the ground will create condensation because of the heat of the sun. The condensation will run down the plastic into your water container.
- Melting ice is quicker than melting snow and it will give you more water while using less heat or having to feed a fire or flame.
- If you do have to use snow, dig down. Outdoor Survival suggests “deeper layers are more granular and provide denser snow.”
- If you do not have fuel to melt your snow, create compact balls of snow and place them in the sun or next to your body in a waterproof container. Suck on the bottom of the ball after it’s melted a little. Place it back in your waterproof container to allow it to melt more.
- Remember: Eating ice and snow that aren’t melted into liquid increases the risk for hypothermia. Always melt ice and snow before you use it as a water source.
4. Rainwater: Rainwater is safe to drink unless it’s been in an area where there was a huge fire or a volcanic eruption. You can collect rainwater in any sort of container you have with you during a survival situation. Also, rocky areas capture a lot of water in depressions. Much of this water stays nearly in these depressions nearly year round. If you want to collect rain water for everyday use, make sure that it’s legal to do so in your city or state first.
5. Plants
- Cup-shaped plants and flowers can hold a collection of water
- Bamboo holds water within its hollow joints
- Some vines hold drinkable water. However, some vines have poisonous sap in them, so learn which vines are safe for drinking from. Cut a notch in the stem. Let the water drip into your mouth from the stem.
- Cacti fruit and bodies store water, but again, not all cacti store water that is safe to drink (for example, the multi-fingered cacti in Arizona is poisonous)
- Many plants hold water at their roots.
What’s your advice for finding a water source in the wild? Have you ever used any of these tricks?
Photos courtesy of WikiHow and Howstuffworks.com
Sources
http://water.usgs.gov/edu/earthgwwells.html
http://adventure.howstuffworks.com/survival/wilderness/how-to-find-water.html
http://www.wikihow.com/Make-Water-in-the-Desert
http://www.pssurvival.com/ps/military_fms/fm_21-76_us_army_survival_manual_2006.pdf
SAS Survival Handbook: How to Survive in the Wild, in any Climate, on Land or at Sea by John ‘Lofty’ Wiseman
Outdoor Survival: The Essential Guide to Equipment and Techniques by Garth Hattingh
The Sense of Survival by J. Allan South
7 comments
Johnny McCarron
I really like your idea to try digging a foot down and wide in muddy areas to get drinking water. In a way, that’s kind of like digging your own mini-well. For my part, I’d like to try to get a full well drilled in our back yard soon. http://mcgrewswelldrilling.com/services
beprepared
William,
Thank you for sharing your experience with us! It’s a great idea to have a desalinator when encountering salt water. Thanks also for the tip about preserving the life of a filter. Do you have any other tips for maintaining a filter? Or any other tips for finding water in the wild?
Thanks,
Angela
beprepared
Frank,
Those are great tips. Have you ever had to use this technique to get water? How much water did it yield for you?
Angela
William Harold De Vaney
While on an expedition in the Arctic, I carried a PUR Reverse Osmosis Desalinator, and pulled the best water from the sea – one of the most dangerous places to become dehydrated. When using any kind of water filtering device, however, it is a good habit to use a handkerchief or cloth scarf to wrap around your filter unit. That way the scarf catches the debris that would otherwise clog your filter – and render it useless quickly, especially off of any river delta systems loaded with sediment. Then the handkerchief or scarf can be rinsed out or, it can even just be left in place if you are using the device a lot, as I was, several times a day. You simply swish the covered filter canister in the water briefly, then pump. Wash it as needed – and be careful that, if you take it off and decide to reuse the dried cloth before washing , you don’t put the soiled side against the filter canister!
A delsalinater works in salt or fresh water, and is worth the money. I’ve used mine for nearly 20 years now, just remembering to flush it occasionally with a biocide disinfectant to keep the membranes clean while in storage. It saves fuel on the trail, is self contained, and tougher than nails. Emergency Essentials, you should carry them – they come in portable emergency versions as well as the larger family unit I carry (about 8 lbs. and basically a tube with a handle, all about 24 in total in length). I have seen them for anywhere from just under $400.00 to nearly $1000.00 for the one I carry. But I can go anywhere with my Kayaq the sea takes me. And don’t have to worry about the bird guano spoiling my dinner. – WKD <www.wkdevaney.blogspot.com>frank
Solar still also works for sea water. Sea water in a bowl evaporates and fresh water condenses on the plastic, then drips into a cup. For sea water, you can also elimanate the hole. Just a bowl, sea water plastic cover , small cup and a weight on the plastic to cause the condensation to drip into the cup.
Now for a really simple trick to get condesation off of leaves or grass. A sponge. ust an ordinary kitchen sponge. Wipe it on the leave or grass, squeeze into mouth.
beprepared
Ron!
Wow! I’m impressed that you made your own solar still. We are going to post a blog post soon about making one. Our blogger found out much of the same things as you did when he made his and will be addressing that. Also, I think it is a great idea to have water sources already mapped out as part of your emergency preparation plans. Does anyone else have any suggestions about ways to find water sources in the areas they live in? Desert areas or otherwise?
Angela
RonGriffin
Being a Southern California desert residence, I can tell you that finding water in the desert here is a major issue. I am very familiar with the Mohave desert and other than man made sources, natural sources such as springs are few and far between. First, being prepared for this area, my BOB contains ample water, filtration, and purification tabs. I also store in addition to my bag, a minimum of 2 extra gallons in what ever car I am driving. If I had to abandon the car, I would hydrate myself to the max first, take every other container I had with the extra water (I also carry an auxiliary tie-on bag to add to my BOB). But probably most important I would only travel in late evening, night and early morning.
As far as the solar still, I decided to build one just for practice. The idea has been around for ever. To be honest, the amount of water it generated would not make up for the sweat I lost building it. It works better if you place a second layer of plastic in the bottom of the hole and if you have any bad water pour it in the hole on top of the plastic (Even urine or the water from MRE heaters). The plants here do not have a lot of moisture. The good news is that the solar effect will be good. Also if you have a space blanket, make a movable barrier that you can position like a mirror to direct more of the sun onto the top plastic. If you do three sides you can almost create a solar stove. But, I think if you are down to nothing but a solar still in the middle of the desert, you are doomed. So find something else. There are some Mohave cactus that do contain safe water. As far as I know, none of the ones in SoCal are bad. (Some are also edible, but that is a big discussion by its self) The tricky part is getting out the water out and not getting all the micro size thorns which can really be irritating if you get them on your lips or in your mouth. Use a piece of cloth as a filter. Cut up the cactus remove as many thorns as possible, place the "meat" in the cloth and them mash it to get the water to drip out minus remaining thorns. If you get thorns in your skin, use duct tape to get them out (Another essential BOB item)
One thing I also do, is I have researched the few springs and have them tagged on my GPS and on paper maps.
The best solution is to head for civilization and find man made sources. I still think the second most important thing to have besides water is a map and knowledge of the area. Prep in advance for the areas you might be in when the SHTF. I carry a Samsung tablet with pre-loaded topo maps and hybrid google earth maps, and a back up Garmin e-trek, PLUS paper maps. Of course batteries or a solar charger for the electronics is required if you go that route. Otherwise, take maps!!!!